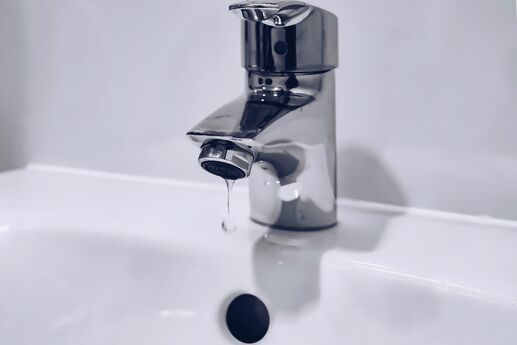
Homeowners with moderate home improvement skills should have no trouble replacing a bathroom faucet. With the right tools and some professional advice, you can complete the task in just a couple of hours.
Things you’ll need:
- Shallow pan or bucket
- Basin wrench
- Adjustable pliers
- Clean rags
- Plumber’s putty
- Newspaper
Removing the old faucet
1. Turn off the hot and cold water supply (shut-off) valves under the sink.
2. Turn on the bathroom faucet to relieve remaining water pressure.
3. Place a shallow pan or bucket underneath the sink to catch any water.
4. The clevis strap is a metal strap under the sink that connects to both the drain’s pivot rod and drain lever, allowing you to engage or disengage the sink’s pop-up drain. Disconnect the clevis strap from the drain’s pivot rod by removing the retaining clip with your hand. Disconnect the clevis strap from the drain lever by loosening the set screw with an adjustable wrench and sliding it off.
5. Use a basin wrench to loosen and remove the water supply lines from the faucet’s inlet tubes, located underneath the faucet. (A basin wrench is a telescoping tool designed to reach the nuts under a sink.) In most cases, you will have to position yourself under the sink to perform this task.
6. Using the basin wrench, loosen and remove the two faucet retaining nuts on the water inlet tubes located on each side of the faucet. (The retaining nuts secure the faucet to the sink or countertop.) Remove the faucet from the sink or countertop.
Installing the new faucet
1. Remove any dirt or debris from the faucet mounting holes.
2. Apply a cord of plumber’s putty — about three-quarters of an inch thick — around the bottom of the faucet base, if needed. (Consult the manufacturer’s instructions and specifications sheet for details. Some faucets incorporate a plastic base, which eliminates the need for plumber’s putty.)
3. Align the new faucet with the mounting holes on the sink and carefully slide it into place.
4. From underneath the sink, thread the two faucet retaining nuts clockwise with your hand onto the faucet’s water inlet tubes, until snug.
5. Check the faucet’s position to verify that it is straight and aligned properly before tightening the retaining nuts with the basin wrench.
6. Thread the water supply line nut clockwise with your hand onto a water inlet tube on the faucet base. Repeat for the remaining supply line. Tighten both supply lines to the faucet body using the basin wrench, until snug.
7. Turn on the water supply valves and verify that the connections do not leak. If a leak develops, tighten the nuts an additional quarter turn.
Connecting the Drain Lever
1. Slide the pop-up drain lever through the opening on the top of the faucet.
2. From underneath the sink, secure the clevis strap to the drain lever by tightening the set screw with an adjustable wrench.
3. Carefully pull down on the drain’s pivot rod to ensure the drain is fully open.
4. Align the pivot rod with one of several holes in the clevis strap, without changing the position of the pivot rod.
5. Secure the pivot rod to the clevis strap using a retaining clip. Alternate the drain lever between the open and closed positions to verify correct operation, and adjust as needed.
Tips:
Place newspaper under the sink and faucet to detect any leaks.
Have an assistant hold the new faucet in place as you tighten the faucet retaining nuts.
Warnings:
Flush the supply lines before connecting them to the new faucet. Often, debris and water deposits inside the line or shut-off valves become dislodged, clogging or damaging your new faucet.